DIY:12U Rack: Difference between revisions
| Line 154: | Line 154: | ||
== {{icon|camera-lens}} Build Pictures == | == {{icon|camera-lens}} Build Pictures == | ||
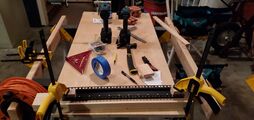
I attempted to document the process as best as I could. The frame was made from the 2x4s once they were transformed into 1.5x3s, the bottom mini-frame is supported by oak 2x1s that I cut from a piece of oak (1x5) in my scrap bin. I then wrapped the frame in 1/2" sanded plywood, using hardwood dowels to secure the rear frame (making it removable). | I attempted to document the process as best as I could. The frame was made from the 2x4s once they were transformed into 1.5x3s, the bottom mini-frame is supported by oak 2x1s that I cut from a piece of oak (1x5) in my scrap bin. I then wrapped the frame in 1/2" sanded plywood, using hardwood dowels to secure the rear frame (making it removable). | ||
<gallery caption="12U Rack Cabinet Build Pictures" widths=256px perrow=2 style="margin:0 auto;"> | |||
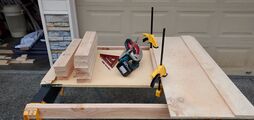
File:20201219_115036.jpg|01. Began by cutting all the frame pieces down to size. | |||
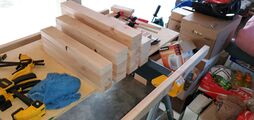
File:20201222_133216.jpg|02. With the frame pieces all cut to size it's time for sanding. | |||
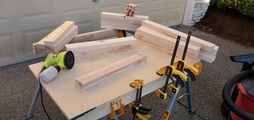
File:20201223_141738.jpg|03. All pieces were sanded with 80, 120 and then 220 grit. | |||
File:20201225_003231.jpg|04. Pocket holes are then drilled in all required pieces. | |||
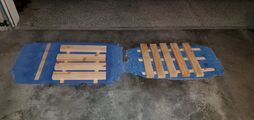
File:20201225_003500.jpg|05. All of the frame pieces receive three coats of lacquer. | |||
File:20201226_160521.jpg|06. The rack rails were then attached to the four posts. | |||
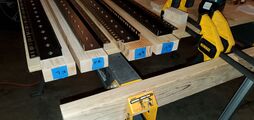
File:20201226_161847.jpg|07. All posts were subsequently labeled. | |||
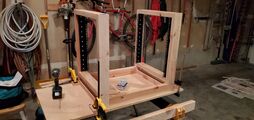
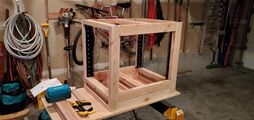
File:20201226_163851.jpg|08. Frame assembly began, starting with the rear. | |||
File:20201226_172535.jpg|09. The front and rear were then connected to form the full frame. | |||
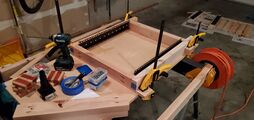
File:20201226_223510.jpg|10. Horizontal beams were added to support the weight of the battery backup units. | |||
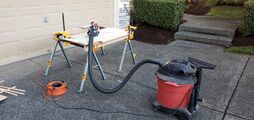
File:20201228_144910.jpg|11. With the frame finished, all the plywood was then cut to size for the cabinet paneling. | |||
File:20201228_170003.jpg|12. Once the plywood was cut, they were sanded and given the lacquer treatment. | |||
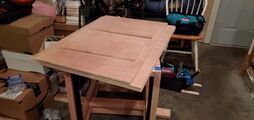
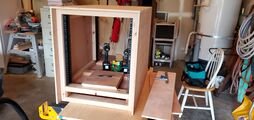
File:20201229_142542.jpg|13. Cabinet assembly was pretty straight forward, I took a deviation from the plans here and decided to nail most of the panels together. | |||
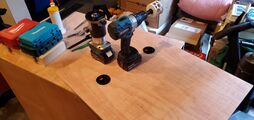
File:20210101_124517.jpg|14. Using a hole saw, I cut two ports on the back compartment for wire grommets. | |||
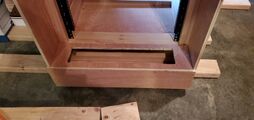
File:20210101_124535.jpg|15. Using a combination jigsaw and then router I cutout a slot for a 2U vented blank that will function as an air intake. | |||
File:20210102_222313.jpg|16. Four hardwood dowels and four oak stop-blocks allow the back panel to be removable. | |||
File:20210103_111505.jpg|17. Test fit of the back panel looks good. | |||
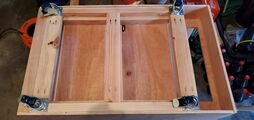
File:20210104_135119.jpg|18. Casters were installed with lag screws. | |||
File:20210105_150254.jpg|19. After a day or two in the garage to let the glue/finish settle I lugged it inside. | |||
File:20210108_154058.jpg|20. Despite the front door not being finished I decided to swap the old rack for the new one, installing everything with Rackstuds. | |||
</gallery> | |||
[[Category:DIY]] | [[Category:DIY]] | ||
Revision as of 18:57, 18 January 2021
 Introduction
In May of 2018 I built a 14U wooden rack frame, while working fine it was a very rudimentary build with no flair, heck not even rails (equipment was fastened directly to the wood).
In the beginning of 2020 as nothing more than wishful thinking, I began designing a rack cabinet in SketchUp. Beginning as a 24U cabinet (2 revisions), shifting to a 20U cabinet (3 revisions), then 12U cabinet (3 revisions), then dual 12U desk (2 revisions) and finally settling back on 12U rack cabinet (4 more revisions). Based on the EIA/ECA-310-E specification, I started with the Z-Series rails from Star Case and included all the features I wanted in a cabinet.
 Plans
Plans
 Parts List
 Glass
Glass
- LEXAN 11" x 14" x 0.093" Clear Polycarbonate Sheet-GE-34
 GE-34
GE-34 8.98 — Home Depot (Purchased: 2021/01/04)
 Lumber
- 1" x 4" x 39" Common Board Bed Slat
 1001749849
 2.39 — Home Depot (Purchased: 2020/12/31) |
  3
3
- 2" x 4" x 92-5/8" Prime Whitewood Stud
 569062
 4.98 — Home Depot (Purchased: 2020/12/14) |
  6
6
- Endesa Sandeply Plywood 1/2" x 4' x 8' (12mm)
 454532
 35.95 — Home Depot (Purchased: 2020/12/28)
- Kelleher 3/8" x 48" Round Dowel
 IM6406U-40
 0.98 — Home Depot (Purchased: 2021/01/01)
 Hardware
- Everbilt 5/16" x 2" Stainless Steel Hex Lag Screw, 5 pc.
 812680
 7.56 — Home Depot (Purchased: 2020/12/31) |
  2
2
- Everbilt Surface Mount Soft Close Hinge, 2 pc.
 9289518
 11.48 — Home Depot (Purchased: 2021/01/04)
- Kreg 2-1/2" Coarse Zinc-Plated Steel Square-Head Pocket Screw, 50 pc.
 SML-C250-50
 5.97 — Home Depot (Purchased: 2020/11/09) |
  2
2
- SPAX 5/16" x 3" POWERLAG Hex Drive Washer Head Lag Screw
 4571820800757
 0.87 — Home Depot (Purchased: 2020/12/31) |
  4
4
- Teks #8 x 1" Philips Truss-Head Lath Screw, Zinc-Plated, 170 pc.
 21508
21508 7.57 — Home Depot (Purchased: 2020/12/26)
- TITAN Industrial 2" Polyurethane Swivel Caster w/ Brake
 4126599LN
 6.98 — Lowe's (Purchased: 2020/12/31) |
  4
4
 Rack Hardware & Accessories
- 2U Blank Rack Mount Spacer, Slotted Venting
 00406023
 17.95 — Navepoint (Purchased: 2020/12/31)
- Rackstuds Series II, Purple, 3.2mm, 20 pc.
 B07W7BWRX3
 17.00 — Amazon (Purchased: 2020/12/26) |
  2
2
 Spray Finish
- Deft Aerosol Interior Clear Wood Finish Brushing Lacquer, Satin
 01713
01713 5.98 — Home Depot (Purchased: 2020/12/22) |
  2
2
 Build Pictures
I attempted to document the process as best as I could. The frame was made from the 2x4s once they were transformed into 1.5x3s, the bottom mini-frame is supported by oak 2x1s that I cut from a piece of oak (1x5) in my scrap bin. I then wrapped the frame in 1/2" sanded plywood, using hardwood dowels to secure the rear frame (making it removable).
- 12U Rack Cabinet Build Pictures
