System Installation
The following tutorial is a collection of notes on how to install the Arch Linux distribution. This guide is mainly suited for use with servers and embedded machines. This tutorial originally started as a YouTube video I had made in early 2012 called How to Install Arch Linux. I then remade this video in late 2012, due to major changes in the installation process, renamed as Arch Linux: System Installation. This tutorial is the spiritual successor to those videos and has been created via the recording notes from said videos.
Following the Arch Linux philosophy, these tutorials are geared at being simple and efficient.
Booting the Installation Media
For use in the creation of this tutorial I used the following environment:
Place the copy of the Arch Linux image you burned to a disc in your machine and reboot. Enter BIOS if necessary to modify the boot device order in order to boot from the media.
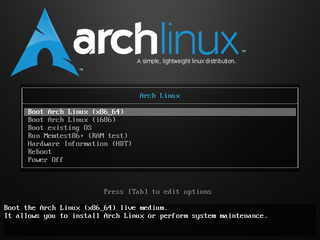
You should be looking at the Arch Linux boot menu, pictured on the right. From this menu select the boot option that corresponds to your architecture type, x86_64 for 64-bit and i686 for 32-bit.
Your system will begin the boot up process, when finished you will be at the console. You may also notice you have been automatically logged into the root account.
Keyboard Keymap (Optional)
If you are using a non-US keymap, you will need to specify which keymap to load. Pull up a list of all the keymaps.
ls /usr/share/kbd/keymaps/
Organization is laid out in directories as Machine Type / Keyboard Type, if you take the name of the map.gz file without the path of extension you can then plug that into the command localectl.
Example for the United Kingdom:
localectl set-keymap uk
